 – Source: Apple Support.
Experimenting can sometimes lead to issues. That’s exactly what happened to me after a failed macOS installation, which resulted in a big question mark with a prompt to visit the Mac restore page.
For some years now, when a Mac is unable to boot macOS and cannot even run macOS Recovery to repair or reinstall the OS, the only way to bring it back to life is to enable DFU Mode (Device Firmware Upgrade). This mode is stored in ROM and cannot be erased under any circumstances.1
DFU Mode has been used for years (forever?) to revive an iPhone or iPad (as well as iPod, Apple TV, and Apple Watch). To use this mode, you connect the device to a Mac, press a specific key combination, and proceed with the restore directly from the computer.
With Intel Macs, recovery used to be different. By pressing specific key combinations, such as CMD (⌘) and R, ALT (⌥), CMD (⌘) and R, or SHIFT (⇧), ALT (⌥), CMD (⌘) and R, you could boot into macOS Recovery from Apple servers to download and reinstall macOS.
In 2018, with the introduction of the T2 Security Chip, internet-based recovery was phased out, and DFU Mode became the only way to restore an unbootable Mac. The downside? You need a second working Mac, which fortunately can be either Apple Silicon or Intel.
But that’s not all. Besides a second Mac, you’ll need three other items and a bit of coordination.
First, you need a USB-C cable to connect the sick Mac to the functioning one, which acts as the doctor. In theory, third-party cables don’t work, but one from my collection activates DFU Mode without issues. If you want to play it safe, I recommend Apple’s 1-meter cable, which is reasonably priced and long enough. Alternatively, there’s the 2-meter cable, though it’s more expensive. Either way, buying a cable costs much less than a trip to the nearest Apple Store.
If the doctor Mac lacks a USB-C port, you can use a USB-A port with an adapter, such as this one or this one, which I’ve personally tested.
The cable connects to the DFU port of the Mac being restored (any USB port works for the doctor Mac). Which port is the DFU port? It varies, and you can find the details here. On the MacBook I restored, it was the port closest to the screen. Wouldn’t it be easier to just mark the correct port?
Lastly, download Apple Configurator 2 from the App Store onto the doctor Mac. Though recent macOS versions allow using Finder, I find Apple Configurator more convenient.
Once everything is ready, open Apple Configurator 2 on the doctor Mac and keep it in the foreground.
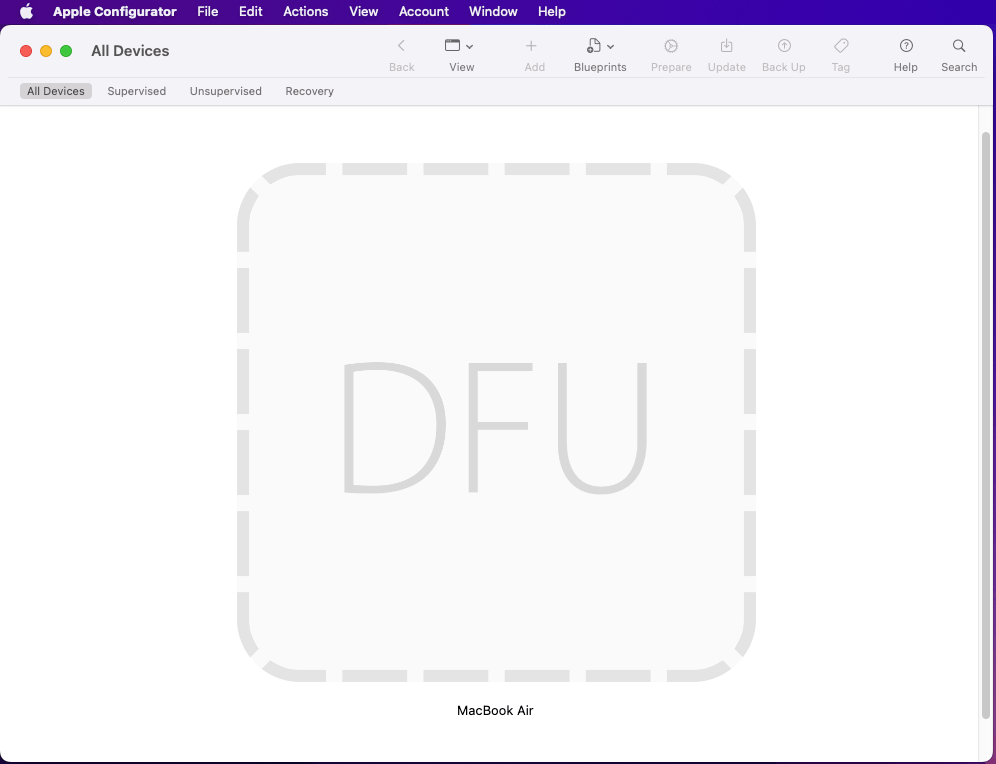
If restoring a desktop Mac, unplug the power cable, press the power button while reconnecting it, and wait 10 seconds. A large DFU square will appear on Apple Configurator, signaling success.

For a MacBook, patience is key, as activating DFU Mode may take several tries. Following Apple’s official instructions, which suggest holding four keys for around 10 seconds, didn’t work for me. Pressing for longer didn’t help either.
Fortunately, I found this video by Mr. Macintosh, followed his steps, and finally succeeded in enabling DFU Mode.2
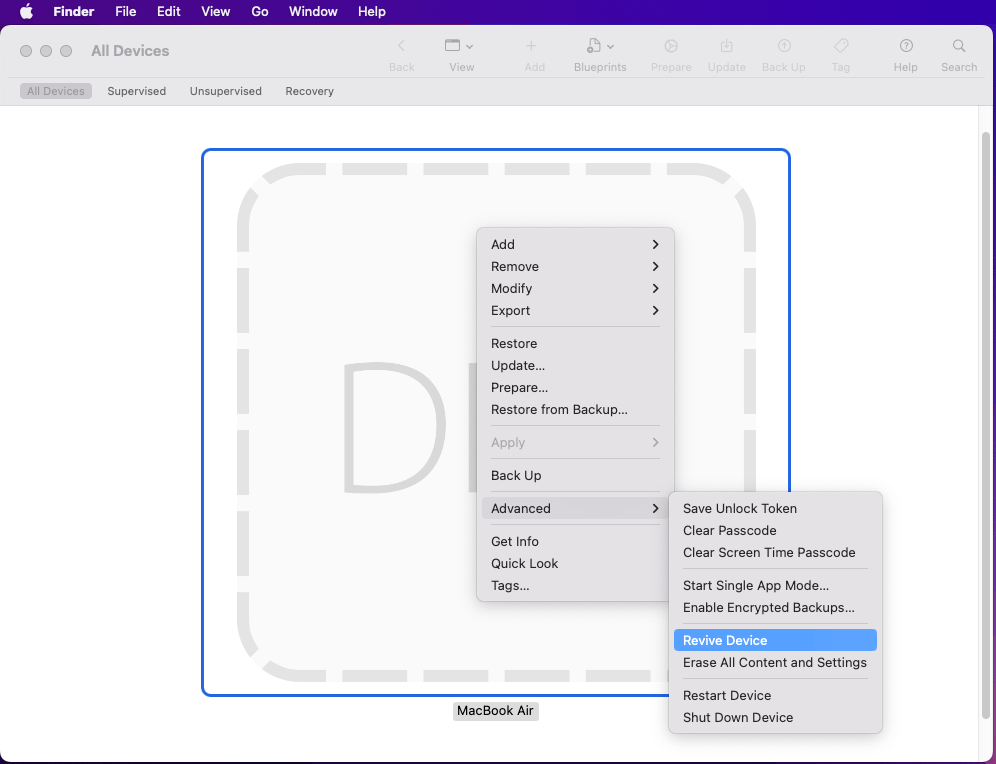
Once DFU Mode is enabled, you have two options. The first is to try reviving the Mac by restoring macOS Recovery without erasing the system disk. Right-click on the DFU square in Apple Configurator, select Advanced, then Revive, and wait while the Mac downloads the macOS Recovery image and transfers it to the sick Mac. If successful, your Mac will be fully operational with all files and applications intact.

If Revive fails, you’ll need to perform a more drastic Restore, which will reset the Mac to factory settings and install the latest macOS version.

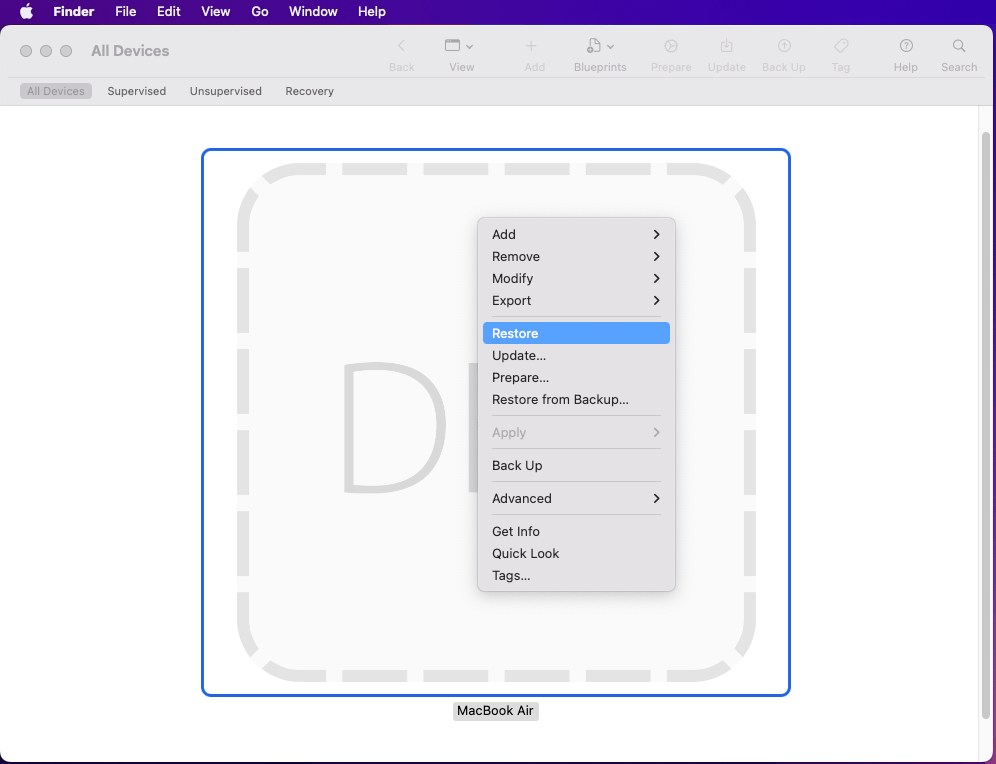
To Restore, right-click on the DFU square and select Restore. Apple Configurator will confirm if you’re sure about resetting the Mac to factory settings. The process, which can take an hour or more depending on your network speed, will download and reinstall macOS.
When the reinstallation of macOS is complete, your Mac will be fully functional but all files and applications will be lost. Not a big deal if you can restore everything from Time Machine (because you always use Time Machine, right?).
-
Unless there’s hardware failure, in which case service is required. ↩
-
There’s also a newer video with two additional methods to enable DFU Mode on a MacBook, though the original method should usually suffice. ↩
 Sabino Maggi